


Gravel bikes are made to take on rough terrain, but regular maintenance is key to keeping them running smoothly and safely. No matter where you ride, maintaining your gravel bike helps extend its lifespan, improve performance, and ensure a more enjoyable ride.
This comprehensive guide will walk you through essential weekly and post-ride maintenance, along with seasonal tips, empowering you to keep your gravel bike in peak condition without always needing professional manpower.
Routine Gravel Bike Care: Weekly and Post-Ride Habits
Consistent attention is the simplest way to protect your gravel bike from excessive wear, especially since gravel terrain can quickly pack dirt and debris into every moving part.
Weekly Gravel Bike Maintenance Checklist
Gravel roads and trails can be tough on your bike. Dust, mud, and grit can wear down components quickly. That’s why a basic weekly check is the best way to prevent bigger issues later on.
Clean the Bike Gently
Rinse your bike using low-pressure water to remove dirt, then clean with a soft brush and bike-safe cleaner. Avoid high-pressure sprays—they can damage bearings and seals. Dry thoroughly with a clean cloth.
Brake System Inspection
Check your brake pads for wear (they have wear indicator lines) and your rotors for thickness (they also have minimum thickness markings). Remove any debris from the pads or rotors.
Test the feel of your brake levers to detect any cable stretch (for mechanical brakes) or sponginess (for hydraulic brakes), which could indicate air in the lines.
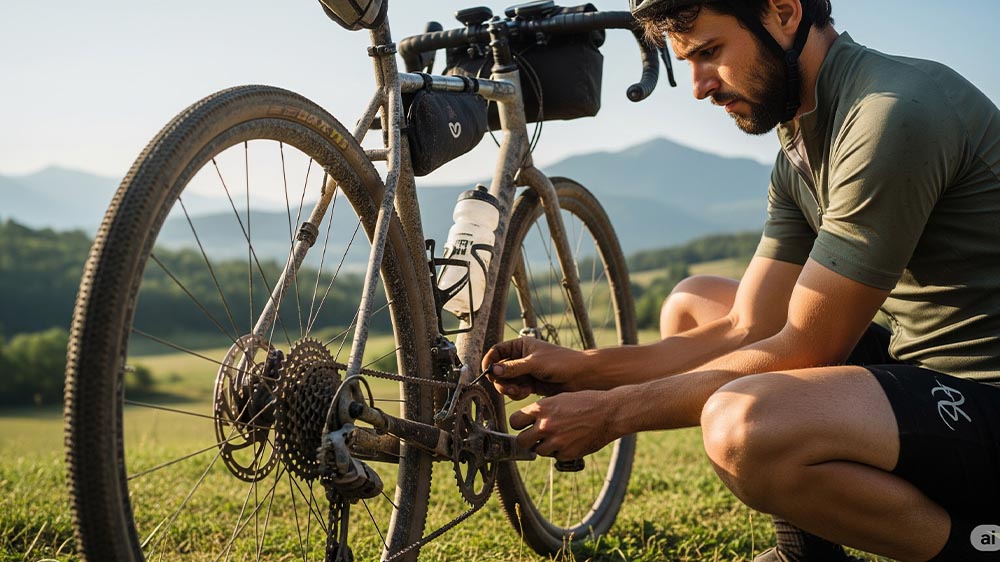
Drivetrain Care
The drivetrain is your bike’s engine on gravel. After cleaning your bike, apply a suitable chain lubricant while backpedaling the chain. Wipe away any excess lube to prevent grit buildup, which can accelerate wear. Additionally, use a stiff brush or an old toothbrush to clear dirt from between your cassette sprockets and chainring teeth. Degrease these components if needed, then wipe dry and visually check for signs of wear.
Bottom Bracket & Crankarm Check
The bumpy nature of gravel terrain can cause components to loosen faster. Grip each crankarm and gently wiggle it side-to-side to check for any play, which could signal a loose or worn bottom bracket.
Rotate the cranks backward and listen for any roughness, grinding, or unusual noises that might indicate worn bearings. If anything feels or sounds off, consider servicing these bearings sooner rather than later.
Post-Ride Essentials: Immediate Checks After Each Ride
These tasks build on your post-ride routine to ensure optimal performance.
Cleaning Your Gravel Bike
After every ride, especially if it was muddy or dusty, gently rinse your bike with low-pressure water. Avoid high-pressure sprays, which can force water into bearings and sensitive components.
Use a bike-specific cleaner and a soft brush to scrub away dirt and grime. Rinse thoroughly and then dry your bike completely with a clean cloth to prevent corrosion.
Inspecting for Damage
Gravel rides often expose your frame and components to flung stones and debris. Carefully inspect the entire bike, including the fork, seat stays, chainstays, and bottom bracket area, for any new scratches, dents, or small cracks.
Pay particular attention to carbon frames, as even tiny cracks can compromise structural integrity over time. If you spot a suspicious mark, examine it closely, and if in doubt, have a professional check it before your next ride.
Tire Condition Check
After each ride, slowly spin both wheels and carefully scan the tread and sidewalls for embedded sharp objects (like glass or thorns), cuts, or abrasions. Remove any small stones or debris lodged in the rubber to prevent future punctures.
Also, squeeze your tires to quickly check for lost air pressure; a slow leak might indicate a thorn or hidden puncture that needs immediate attention.
Seasonal Gravel Bike Maintenance

Beyond your weekly and post-ride routines, adapting your gravel bike maintenance to the seasons is crucial for year-round performance. Extreme weather conditions, in particular, demand extra attention.
- Proper Storage in Extreme Weather: If you’re storing your bike for an extended period, such as over a hot summer or a freezing winter, ensure it’s thoroughly clean and dry beforehand to prevent corrosion.
In winter, avoid storing your bike outside where temperatures consistently drop below freezing, as this can damage seals, cables, and plastic components.
In extreme summer heat, protect your bike from direct sunlight to prevent tire deformation and paint fading. Ideally, store your gravel bike indoors in a cool, dry place year-round.
- Winter Riding Best Practices: Winter gravel rides often involve more mud, grit, and potentially salty roads, all of which accelerate wear on your components. Clean your bike meticulously after every winter ride, paying extra attention to the drivetrain and brake system.
Apply a wet-condition-specific chain lube more frequently, and consider fitting winter-specific tires with deeper tread patterns for better traction on wet or icy paths. Also, check your brake pads more often, as grit can cause them to wear down rapidly.
- Spring Tune-Up Checklist: After enduring the winter months, give your gravel bicycle a comprehensive tune-up before the main riding season begins.
Inspect all cables and housing for signs of rust or fraying. Check your chain and cassette for wear using a chain checker. Re-inspect brake pads and rotors, and use a torque wrench to ensure all bolts are tightened to the manufacturer’s specifications.
If you’re running tubeless tires, refresh the sealant. Also, thoroughly inspect your wheel rims and spokes for any damage from winter grit. If you rode heavily through challenging winter conditions, a professional tune-up is a smart investment.
Essential Tools for Gravel Bike Maintenance at Home
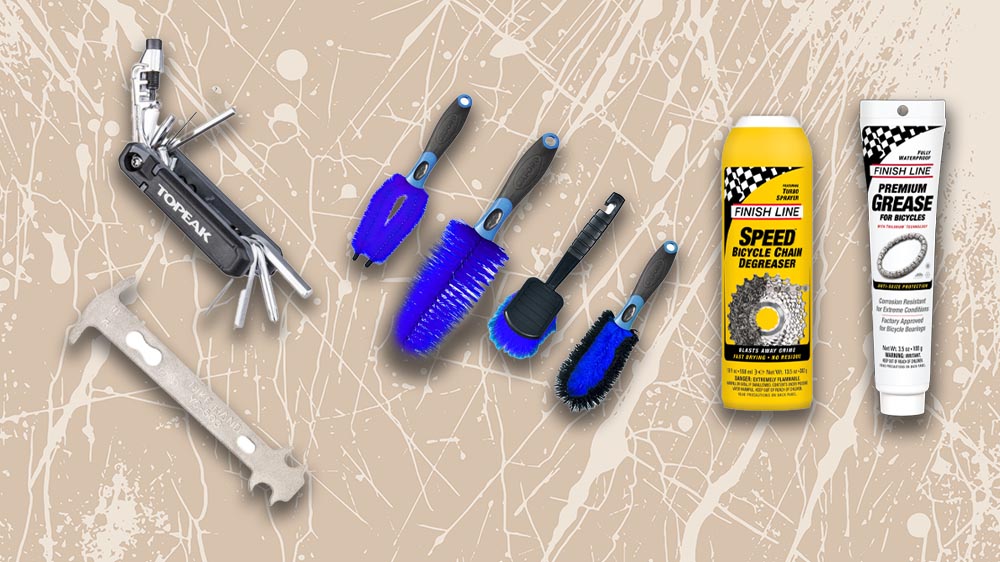
Having the right tools helps you stay on top of your gravel bike’s condition without needing constant visits to a repair shop.
- Multi-tool: A compact kit with Allen keys, screwdrivers, and more for on-the-go fixes.
- Chain Checker: Tracks chain wear and helps prevent damage to cassettes and chainrings.
- Brush Kit: A set of soft and stiff brushes to clean all bike components thoroughly.
- Bike Stand: Keeps your bike stable while you clean, adjust, or inspect it.
- Degreaser: Removes old lubricant and grime from chains and gears.
- Grease: Helps prevent corrosion and keeps bolts and bearings protected.
When to Call a Professional Mechanic

Even if you’re confident with home bike maintenance, there comes a moment in every rider’s journey when a professional’s touch is not just helpful—it’s essential.
Imagine this: you’re out on your usual gravel loop when you begin to hear a subtle cracking noise every time you press down on the pedals. You’ve cleaned your drivetrain and tightened the bolts, but the sound lingers.
That faint crack could be more than just a loose screw—it might point to worn bearings or even early signs of a structural issue in your frame.
Or perhaps, after giving your drivetrain a good scrub and re-lubing the chain, you notice your gears still feel sluggish and inconsistent. Shifting should feel crisp and responsive. If it doesn’t, there could be deeper alignment issues or worn-out parts that only a trained eye can spot and fix.
Then there’s braking. A spongy or weak brake feel—especially after cleaning the rotors and checking the pads—could mean there’s air in your hydraulic lines or your pads are too far gone. When stopping power becomes questionable, it’s not worth the risk—get it checked.
And let’s not forget those post-crash moments. Even if your bike looks fine after a fall, hairline cracks, misalignments, or hidden stress points can develop.
These issues may not be visible to the naked eye, but they can compromise safety over time. A professional mechanic has the tools and experience to catch what we might miss.
In these cases, a trip to your local workshop isn’t just maintenance—it’s peace of mind. Because when it comes to your safety and your bike’s long-term health, some things are better left to the experts.
Keep Your Gravel Bike Adventure-Ready
Gravel bike maintenance doesn’t have to be difficult. With a bit of weekly care, seasonal attention, and the right tools, you’ll enjoy a smoother, safer, and longer-lasting ride.
Whether you’re prepping for weekend bikepacking or daily gravel commutes, regular upkeep protects your gear and boosts your confidence on every ride. And when in doubt, don’t hesitate to visit a professional to keep your bike in top shape.
Take care of your gravel bike, and it’ll take care of every road ahead.
Read also


